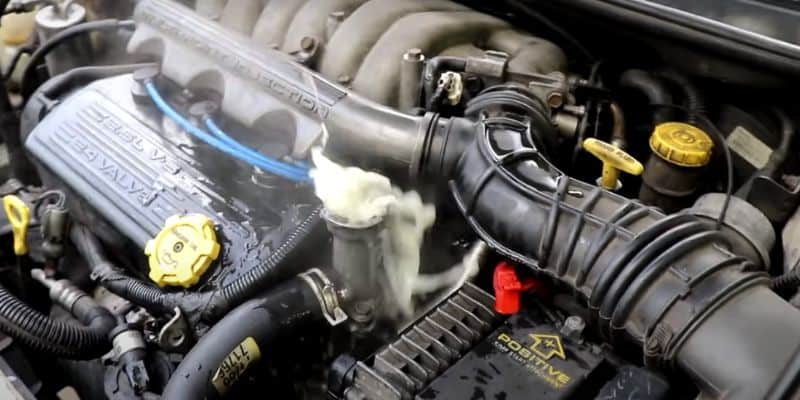
A reliable cooling system is key to engine health. However, one puzzling issue is when coolant boils excessively yet the temperature reads normally. At first glance, this seems contradictory – how can fluid boil before the engine warms? There are actually several potential explanations for premature boiling.
In this article, we explore common causes of coolant is boiling but not overheating. We’ll discuss factors like low fluid levels, faulty components, and air pockets that allow isolated areas to boil independently of the overall temperature.
Our aim is to help you diagnose and address the coolant boiling problems to restore efficient heat dissipation.
10 Causes of Coolant Boiling but not Overheating
These are ten potential causes of your coolant boiling but not overheating.
- Low coolant level
- Failed thermostat
- Clogged radiator fins
- Loose or damaged radiator/coolant hoses
- Air in the cooling system
- Failed water pump
- Defective coolant temperature sensor
- Broken fan/fan clutch
- Head gasket failure
- Cracked engine block
It could be any single cause among these or the sum of many problems. You need to understand each cause of coolant bubbling to fix it accordingly.
1. Low Coolant Level
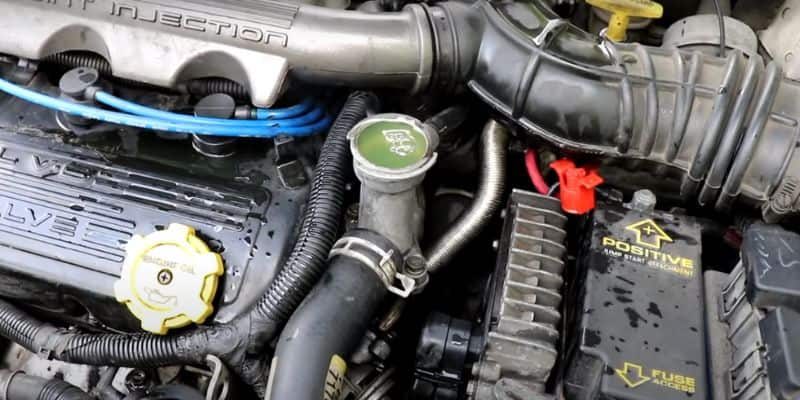
The cooling system relies on sufficient coolant to effectively transfer heat. With low levels, air can enter and become trapped in high points of the cooling circuit.
During operation, these isolated air pockets will exceed the boiling point for water much sooner than the surrounding liquid coolant. Vehicle owners often overlook low fluid, so it’s essential to check and top up to the full line regularly.
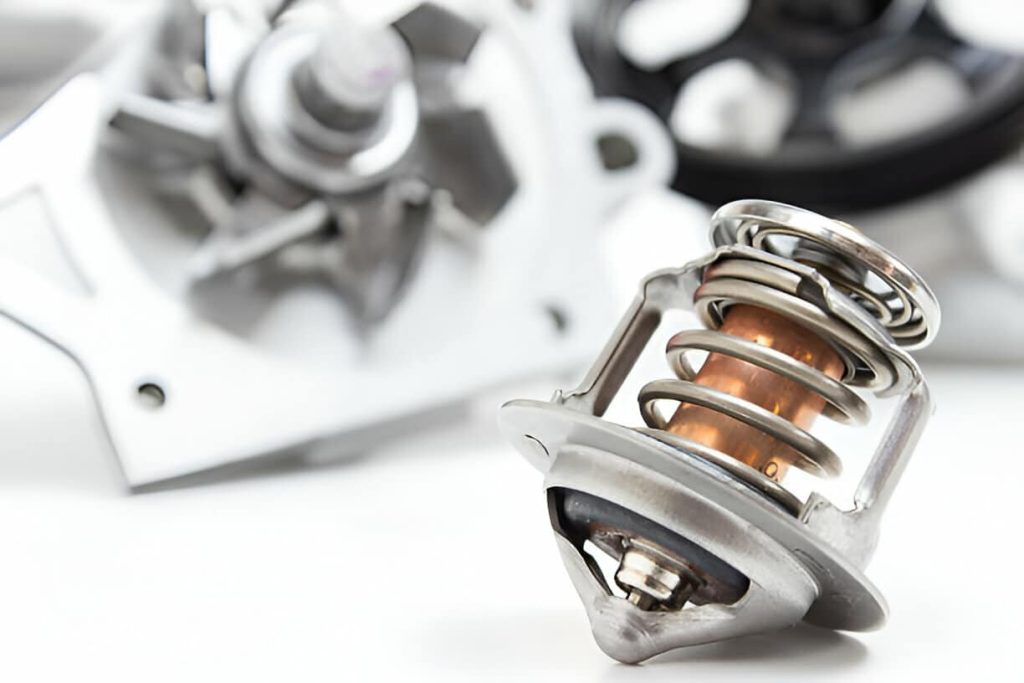
2. Failed Thermostat
The thermostat precisely controls coolant flow to maintain optimal engine temperature. If it fails to open and remains stuck, coolant continually bypasses the radiator without receiving adequate cooling.
As a result, localized boiling occurs inside the engine before heat has a chance to disperse through the radiator. A simple thermostat test and replacement can resolve this.
3. Clogged Radiator Fins
Over time, dirt, debris, and mineral deposits reduce the radiator’s efficiency by blocking air movement through its fins.
With restricted airflow and poorer heat exchange, hot spots develop where the coolant has difficulty releasing its load. The first signs are usually boils appearing in or around a radiator that needs cleaning.
4. Loose or Damaged Hoses/Pipes
Cracks, kinks, or other damage to hoses or pipes disrupt smooth coolant flow, creating pressure points. These constricted areas cause coolant to linger and boil sooner than intended.
A thorough hose and pipe inspection catches any weary spots needing replacement before a rupture occurs.
5. Air in the Cooling System
Trapped air pockets insulate sections of the circuit from receiving adequate heat transfer.
During operation, these isolated air spaces are primed to boil off independently from the rest of the pressurized liquid coolant. Carefully bleeding air from the system restores full heat exchange.
6. Failed Water Pump
As the coolant pump begins losing efficiency, reduced flow allows localized overheating known as “hot spots.”
Minor centrifugal pump issues can manifest as sporadic boiling until service is required to repair or replace the worn pump.
7. Defective Coolant Temperature Sensor
If this crucial component provides incorrect temperature readings, the vehicle’s computer can’t properly control components like the fan or thermostat. Improper thermoregulation permits premature boiling until the faulty part is diagnosed and replaced.
8. Broken Fan/Fan Clutch
On hot days, these integral fans promote radiator heat dissipation during driving and briefly after engine shutdown. Without proper functioning, temperature control suffers and isolated boiling can occur despite a lower overall temperature.
9. Head Gasket Failure
On rare occasions, a blown or failing head gasket allows engine coolant to mix with oil. This contamination raises local temperatures in the cylinder head, accelerating coolant breakdown at these trouble spots. Prompt gasket replacement avoids further issues.
10. Cracked Engine Block
In severe neglect cases, cracking in the block itself disrupts coolant movement. The fractures generate hot zones between the cracks before a visible overheating, requiring a rebuild or replacement of the damaged engine.
How to Diagnose the Coolant Reservoir Boiling Cause?
Here are four methods to diagnose the cause of coolant reservoir boiling:
A. Visual inspection of coolant level/leakage
The first step is inspecting the coolant reservoir for proper fluid level and signs of leakage. Low levels indicate the need for top-up, while leaking usually points to hose/pipe issues.
Inspect all hoses for bulges/cracks too. This quick visual check rules out many common causes.
B. Thermostat test
Remove the thermostat and place it in boiling water, checking that it fully opens at the specified temperature. It should also close fully once cooled.
Any hesitation or failure to open/close properly indicates replacement is required. This simple test efficiently diagnoses a potentially faulty thermostat.
C. Radiator pressure test
Capping off the radiator and pressurizing the system checks for leaks at pressure points like hoses, seams, or cracks. It also assesses mechanical water pump functionality under simulated load.
Any pressure drop or visible leaking spot directs further diagnosis and repair in that trouble area.
D. Coolant temperature sensor test
Compare sensor readings taken with a multimeter against actual coolant temperature probes. Inaccurate or fluctuating sensor voltage values point to the need for sensor replacement.
Vehicle computers rely on correct sensor data for controlling thermostatic functions like fan operation, so a faulty unit must be addressed.
How to fix the coolant boiling when the engine is not overheating?
A. Refill coolant
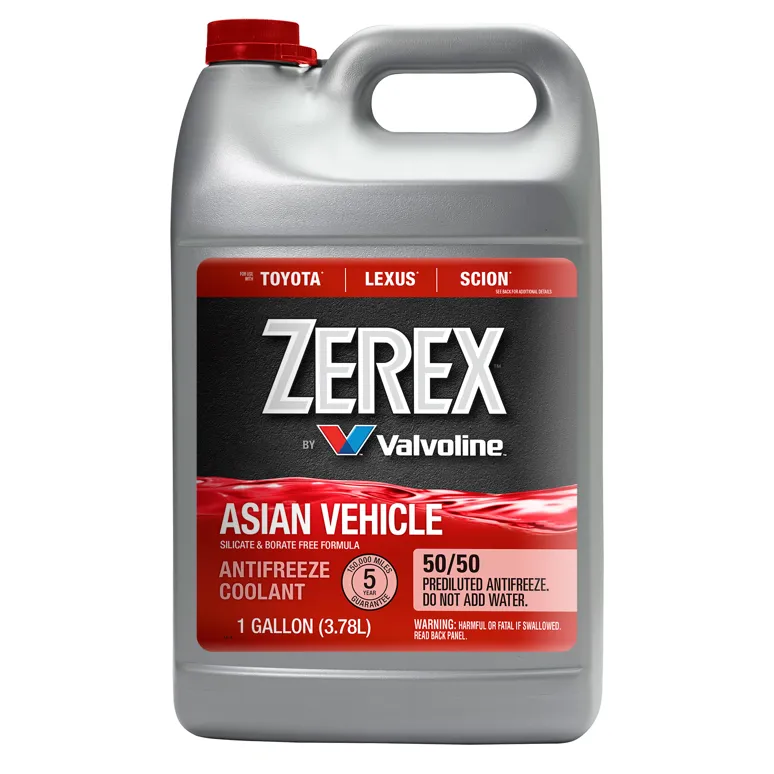
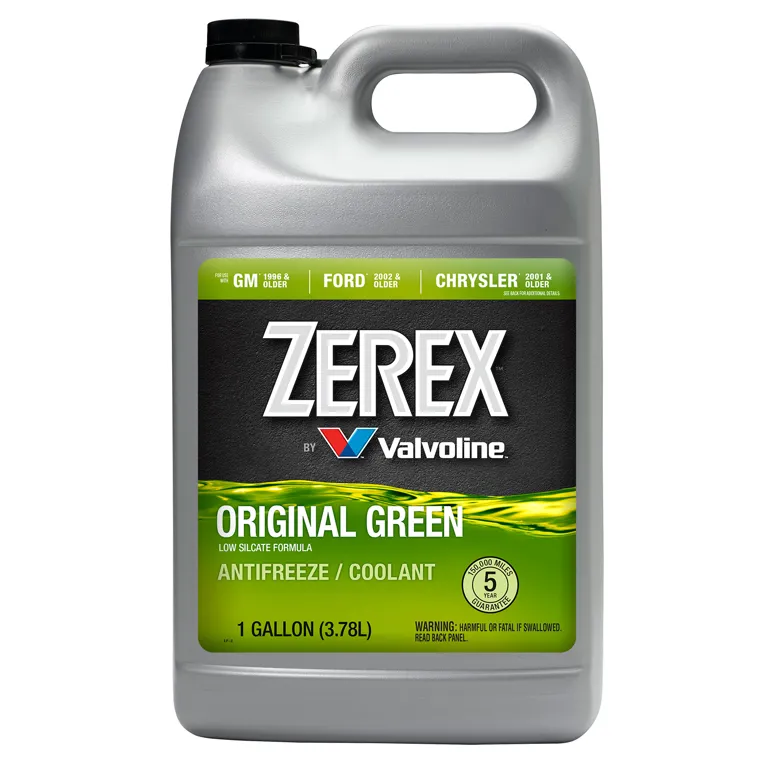
Properly refilling addresses low levels causing air pockets. Use a 50/50 premix to protect against freezing and boiling. Remove the filler cap and insert a funnel. With the engine cold, pour coolant slowly into the overflow reservoir until the level reaches the “cold full” mark.
Replace the cap and run the engine to operating temp to replenish the coolant displaced into the block. Top off as needed to ensure air is purged from the system.
B. Replace thermostat
- Drain some coolant and remove the thermostat housing.
- Inspect for debris blocking operation.
- Install a new OEM-spec thermostat, ensuring the seal surface is clean.
- Apply a thin layer of silicone gasket sealant.
- Refit housing and tighten bolts sequentially.
- Refill coolant and bleed air to remove air pockets.
- Cycle the engine to ensure proper opening and closing of the thermostat.
- Monitor the temperature gauge to verify it reaches mid-range normally.
C. Flush and clean radiator
Drain the coolant and remove the radiator cap. Using a radiator flush, inject cleaner into the radiator inlet and let it circulate. Agitate hoses to dislodge debris, then flush thoroughly with a garden hose. Inspect for remaining particles that may reblock flow.
Install new coolant and conditioner to protect the system. Pressure test the radiator to check integrity before refitting onto the vehicle.
D. Replace hoses and pipes
Inspect all coolant hoses and pipes, squeezing to check for bulges. Twist or flex hoses looking for cracks. Replace any questionable components with exact OEM-spec parts. Cut hoses to the proper length if needed.
Lubricate ends and fittings before installation. Secure clamps tightly once in place to prevent leaks. Start the engine and inspect for leaks while pressure is applied during the heating cycle.
E. Bleed air from the system
Loosen the bleed screw or radiator cap to allow air escape. Have an assistant start the engine while you feel for pulses indicating air movement.
Once steady coolant flow is observed, top off the reservoir if needed. Run the engine briefly until the upper hoses are fully warm and pulsing stops, ensuring air is completely bled.
Inspect for remaining bubbles that indicate air is still trapped. Repeat the process if the air isn’t fully expelled.
F. Replace water pump
Drain coolant and disconnect pump electrical connection and drive belts. Note the pump rotation arrow.
Remove the bolts holding the pump in place. Inspect the impeller and housing for wear before replacing them with an exact OEM match.
Reinstall in reverse, replacing gaskets or seals if worn. Refill coolant and bleed air bubbles. Inspect for leaks once the system is pressurized during the engine warm-up cycle.
Consequences of Ignoring Coolant Reservoir Boiling
These are potential risks of ignoring coolant boiling but the engine not overheating.
Overheating damage to the engine
Prolonged boiling indicates inadequate heat transfer, leading to overall overheating. This causes warping and failure of precision-fitted components from expanded metal contact under extreme heat.
Head gaskets and seals blister and burst. Unaddressed boiling results in catastrophic failures like blown head gaskets.
Head gasket failure
Head gaskets are the critical multi-layer sealing between the engine block and cylinder heads. Overheating causes the different metals to expand at mismatched rates, breaking the seal.
When compromised, gaskets allow coolant and combustion gasses to mix, ruining the engine. Boiling aids rapid gasket degradation if the root cause isn’t fixed.
Cracked engine block
The engine block, made of cast iron or aluminum, can crack when frequently stressed by thermal expansion under high heat. Cracks develop where metal is weakest due to imperfections.
Over time, they worsen and branch out, leading to a destroyed short block. Boiling foreshadows dangerous overheating that causes block cracking.
Warped cylinder heads
These crucial cast aluminum or iron components housing the valves can become warped out of shape from intense, prolonged engine heating.
When warped, valves no longer seal and compressions are lost. Head warping from overheating ruins expensive cylinder heads, which must then be replaced or machined if the warp is minor.
FAQs
How can I tell if my coolant is boiling?
There are a few clear signs that indicate your engine coolant is boiling:
- You’ll see visible bubbling, frothing, or churning of the coolant inside the radiator reservoir or overflow tank. Coolant at a rolling boil looks very similar to a pot of water on the stove.
- You may notice coolant bubbling or “gurgling” noises coming from the radiator or coolant pipes. Listen closely to the engine running.
- Check for coolant spatters and droplets around the radiator cap, radiator hoses, or coolant pipe connections. Boiling coolant can cause small eruptions.
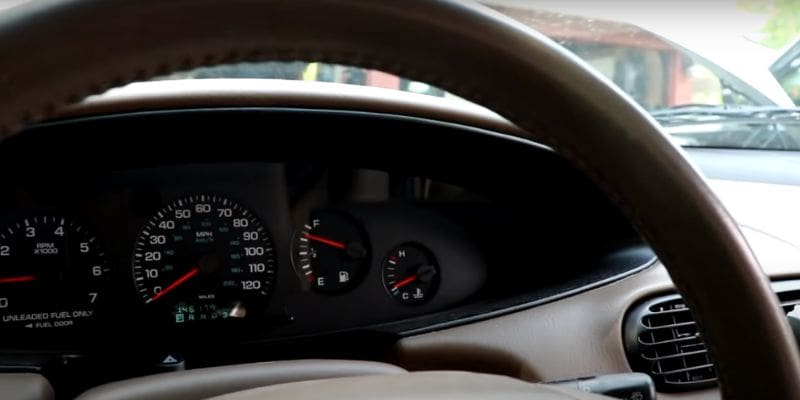
- Pay attention to temperature readings. If the gauge rises into the hot zone but then hovers or fluctuates without reaching the proper operating temperature, it’s a sign of boiling issues preventing the engine from fully heating up.
- Also, look for changes in coolant color or consistency from the proper mixture as boiling breaks the fluid down over time if the root cause isn’t addressed.
What would cause the coolant temperature gauge to read hot but the engine running cold?
Several factors can lead to a coolant temperature gauge reading hot while the engine is running cold:
- Faulty Temperature Sensor: A malfunctioning coolant temperature sensor may provide inaccurate readings to the gauge.
- Air Pockets: Air trapped in the cooling system can cause false temperature readings. Proper bleeding of air from the system is essential.
- Faulty Thermostat: A thermostat that’s stuck closed can restrict coolant flow, leading to inaccurate temperature readings.
- Electrical Issues: Wiring or connectivity problems in the temperature sensor circuit can result in incorrect gauge readings.
How to burp air from the cooling system?
Here are the basic steps to burp air from a cooling system:
- Loosen the radiator cap or overflow tank cap slightly to allow pressure to release without coolant escaping.
- Start the engine and let it run at 1500-2000 RPMs. The increased water pump speed helps move air pockets.
- Check the highest point of the cooling system, like the heater hose, for pulsing or escaping air. Have an assistant wiggle hoses to dislodge any remaining air.
- Once steady coolant flow is observed with no air, tighten the radiator cap back down securely.
- Top off the coolant reservoir if needed to maintain the proper fluid level.
- Continue running the engine for several more minutes to ensure all air is purged.
- Recheck coolant levels when the engine is fully cooled and top off if required.
Why is my coolant boiling but not overheating?
Coolant boiling without overheating can be caused by factors such as a malfunctioning radiator cap, air pockets in the cooling system, or a failing water pump.
Air pockets prevent proper coolant circulation, leading to localized overheating. A failing water pump may not circulate coolant efficiently, causing localized boiling.
Can driving with boiling coolant damage my engine?
Yes, driving with boiling coolant can potentially damage your engine. When coolant boils, it loses its ability to effectively regulate temperature, leading to overheating.
Continuous operation under these conditions can cause severe engine damage, including warped cylinder heads, blown gaskets, or even engine failure.
How often should I check my coolant levels?
It’s recommended to inspect the coolant level at least once a month, especially before long journeys. Additionally, perform a thorough check before seasonal changes, as temperature variations can impact coolant performance.
Is it safe to add water to boiling coolant?
No, it’s not safe to add water to boiling coolant. Here are some reasons why:
- Temperature shock: Water is cooler than boiling coolant. Adding water can cause rapid temperature changes within the cooling system that can put unnecessary stress on components.
- Dilution of coolant: Most modern cooling systems require a precise mixture of antifreeze and water for proper corrosion protection and boiling/freezing point characteristics. Adding straight water dilutes the coolant concentration.
- Increased boiling point: Coolant has additives that raise its boiling point above that of water. Adding water lowers the overall boiling point of the solution, reducing its heat transfer effectiveness.
- Potential for cracking: The sudden temperature change from adding coolant can cause cracking in critically stressed areas like the cylinder head, engine block, or radiator from rapid thermal expansion/contraction.
- Continued boiling: Water lacks the inhibitors in coolant and won’t prevent localized boiling. The root cause (low coolant level, air entrapment, etc) still needs addressing for proper cooling.
Conclusion
coolant boiling without associated overheating can indicate several underlying issues within the cooling system. The most common culprits are low coolant level, air entrapment, restricted flow, and failed components inhibiting proper heat transfer.
With regular coolant checks, maintenance like fluid flushes, and prompt response to symptom resolution, cooling systems can prevent the engine from overheating.

Hi, Michael Williams here. I have always loved everything with an engine. After earning my degree in automotive engineering, I spent 5 years testing vehicles for a major manufacturer in Illinois. Now I am using my technical skills to review the latest models online and help others troubleshoot their engine problems with effective solutions.